Wednesday, December 19, 2012

Come Make Cake & Brownie Pops with Me!!!

Happy Wednesday!  It's that time of the year where everyone has tons of Christmas parties to attend-- with friends, family, and co-workers.  Sometimes it's nice to bring a little cheerful treat.  So, I will show you today how I made my cake & brownie pops.

I got the recipe from divascancook.com.  You can find more detailed directions from her website: Divas Can Cook .  I love all her recipes and I watch her on YouTube, so I definitely want to give credits where they are due.  This took me a little over an hour to make, a little longer than expected, because I was tying up the ribbons and trying to make them look nice.

Ingredients:
- Chocolate cake (box cakes are fine)
- Brownie from a box
- Chocolate frosting
- 2 Boxes of Baker's white and dark chocolate, the kind that you can use to dip and cover strawberries
- Cake pop sticks (I got these at Party City)
- Sprinkles

Instructions:

Make your cake according to the instructions on the box

I had way too much cake, so I made the excess batter into cupcakes


Crumble up your cake batter until they look like bread crumbs.  Then add in chocolate frosting a little bit at a time just to "glue" the crumbs together.  The point is to make the batter moist and easy to roll into tiny balls.  You don't want the balls to be too big, otherwise they will slide off the sticks later. (Sorry I forgot to take a picture here).

After the batter has been divided up and rolled into balls, put them in the fridge to let them harden a little while you melt the white chocolate.


After the white chocolate has been melted, dip the tips of the cake pop sticks into the white chocolate.  The dipped white chocolate will act as the "glue" to make sure that the cake will stay on the cake pops and not slide off.

Once the cake pop sticks have been dipped, take out the cake balls from the fridge and immediately insert the sticks into the cake balls about half way to secure them.

Put the cake pops into the freezer for about half an hour.

Melt more white chocolate in a cup while the cake pops freeze.

Take the cake pops out from the freezer after 30 minutes. Now submerge and dip the cake balls entirely into your cup with the melted white chocolate.

Make sure that the cake ball is completely covered.  If not, REDIP!

Now that the cake balls are entirely covered, you can decorate them with sprinkles!  Please do this step relatively quickly because the white chocolate will start to harden and the sprinkles won't stick on as well.


Stick the finished cake pops in a box.  I just pop some holes on top of an old shoe box.


Put the finished cake pops back into the freezer for at least another half hour.  I think I actually left them inside for a full hour.


While the cake pops are in the freezer, we can now move on to the brownie pops!  Bake your brownie according to the direction on the box.  When finished, roll the brownie into little balls like the cake balls earlier.  This time, I am using the dark chocolate from Baker's instead.  Repeat the same steps from above regarding dipping your sticks and inserting them into the brownie balls.


Now cover your brownie in MELTED DARK CHOCOLATE before drizzling meted white chocolate to decorate them.

Ta da!!

Now put the brownie pops on a shoe box and trade with the cake pops from the freezer.
Take them out after you are done freezing them and wrap them individually!


There you have it!  Cute and pretty brownie & cake pops.  Don't forget to follow me on twitter @bumbeepicks.  Until then, merry Christmas everybody!!

~ Bumbee

Wednesday, July 25, 2012

Burger Dinner!!

This is an interim post, because I did want to have a whole entry on my cake pops. :)  However, yesterday, hubby pulled a spontaneous burger dinner.  Since he rarely cooks during the week, I thought it was blog worthy!

I'm not a huge meat person, so we only had 1lb of ground beef.  He added two eggs, some scallion that I grew in our living room (see previous post here: http://bumbeepicks.blogspot.com/2012/07/regrowth-revisited-scallion-pancakes.html), and some leftover white mushrooms that I was going to use for spaghetti.


They looked quite disgusting to me, but I was told that for people who love meat, they'd find these succulent patties delicious. 


It's quite colorful!

He added a lot of seasoning and spices...


Since we don't store up burger buns in this Asian household, we had to eat them on regular bread.  See the mini one on the right? That was mine! :)  It was actually VERY VERY yummy!!  Just like how they looked, the meat was very juicy, even though mine was very well-done.

For the "health conscious" readers:
Health content: Well, it wasn't the healthiest meal we've ever had, but for a burger, it wasn't too bad.  When he cooked the patties, he didn't use any extra oil.  The Green Wise ground beef was 93% lean and everything else added was organically grown.  The bread on the bottom was whole grain.  So, it wasn't TOOOOOOOO bad per se.  I did actually bother to count the calories for each patty.  I had two of the little ones in the back and those added up to be about 600 calories.  I also had one buffalo chicken drumstick as well, so my dinner came out to be about 800 calories altogether, which was originally shocking, but luckily I had already burned off 650 calories earlier in the day walking 5 miles and doing an hour of BodyCombat cardio kickoxing.  So, overall, it was a fabulous eating/exercising day!

Friday, July 20, 2012

Regrowth Revisited & Scallion Pancakes!

A little over a week ago, I tried (for the first time) to grow my own green onion / scallion.  I wanted to do an experiment to see which environment would be best for my scallion.  I put some roots in just plain water & a jar, and the rest in a clay pot with Miracle Growth that hubby bought from Home Depot.

To my amazement, the ones in water are doing SO MUCH better!
Picture above: This was a little bit over a week ago.  And now...

Isn't that amazing??  I hardly did anything to care for them.  Reminds me of Matthew 6:28-30 where Jesus said, "Consider the lilies of the field, how they grow: they neither toil nor spin, ...But if God so clothes the grass of the field, which today is alive and tomorrow is thrown into the oven, will he not much more clothe you..."  It's so true!  I didn't do anything to cause the growth, but to just throw the roots in water.  Look how they grew!!

Now, let's take a look at the ones in SOIL.  It's quite ironic...
They definitely did not grow as tall or as quickly as the ones in water.  Now, let's see them together...
The ones in water are clearly doing better.  I started several other little jars.  So excited this experiment worked!!

You may be wondering, what should I do with all that scallion even if it really is that easy to grow? Let me show you an easy scallion pancake recipe!!


MAKING MINI SCALLION PANCAKES 葱油饼 FROM DUMPLING WRAPPERS


Scallion pancake is a very common Chinese dish that can be eaten for any meal.  Some are doughy and some are flaky.  I usually prefer the flaky type, but those are typically very unhealthy because they are deep fried.

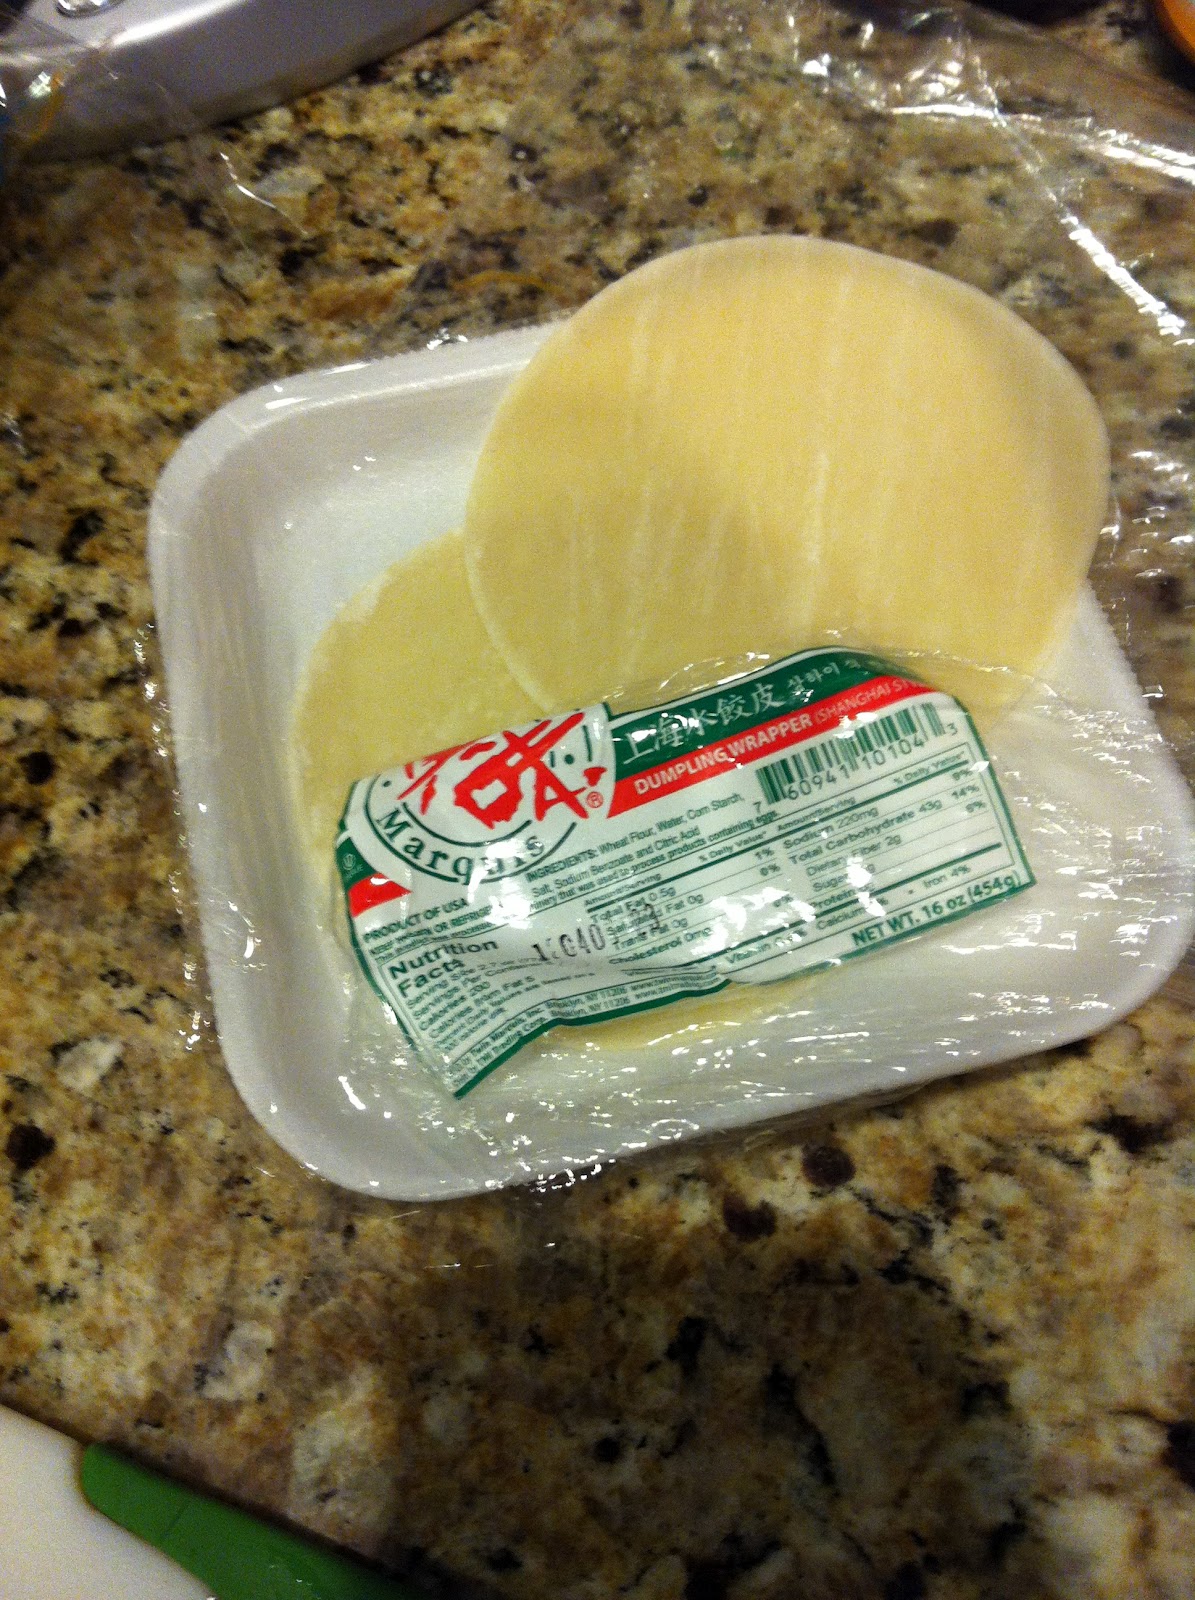
My mini scallion pancakes are actually made from dumpling wrappers.  I was making dumplings the other day, but didn't end up using all the wrappers that came in the package.  Throwing them away felt too wasteful to me, and it was too hot to throw them into a soup.  So, instead, I made them into scallion pancakes!


Step #1: You will need two dumpling wrappers for each scallion pancake.  So, make sure you have enough wrappers.  I happened to have 8 left. :) Yay!

Step #2: Chop up some green onion / scallion.


Step #3: (optional) You can put the scallion between the dumpling wrappers first.


Step #4 (optional) Then use a rolling pin to flatten and expand the sealed wrappers.


Step #5: If you are lazy and short on time, you can skip steps 3 and 4 and go straight here.  Heat up your pan and oil.  The interesting caveat about Chinese cooking is that there is no recipe.  Real good Chinese chefs don't use recipes, or so I was told.  Therefore, I am not really sure how much oil you should use.  I kind of just drizzled it in the pan. :)


Step #6: If you want to skip steps #3 and #4, then just put down the wrappers one at a time without the scallion.

The problem I found was that I had to work quickly before the sides started curling up.  

Step #7: Add in some eggs and scallions on top of the wrappers that are in the pan.


Step #8: Then seal the egg & scallion by putting another wrapper on.  I forgot to take a picture; still not very good at cooking while taking pictures.  Basically you want to drizzle the egg on and scatter the scallion before adding the top wrapper.

Step #9: And... ta da!! Here it is!


And now you can grow your own scallion & make scallion pancakes with leftover dumpling wrappers. :)

Next Post: CAKE POPS!!

Thursday, July 12, 2012

Simple Regrowth

I use a lot of scallion / green onion in my cooking. They are used very frequently in Asian cuisine for flavoring, and they are typically just $1 for 2 bunches, which is not expensive at all. However, I was told by a friend that I can very easily grow them myself.


I was very wary of growing anything, because all plants that come inside our home end up dying! I can't seem to take care of any living things, which is another reason that we don't have pets. I haven't graduated from plants yet.

I did a quick research on how to grow scallion. All food and farm blogs say that all I have to do is to put the roots in water and leave them by the window and they should grow in days! Too good to be true, I thought. But.. I gave it a shot!

I kept the root of each scallion after I cooked.  I put the roots in a small plastic jar and filled the bottom with water.


This is how small the jar is.

LET THE EXPERIMENT BEGIN!!
In just two days, the new branch started growing!! I think the ones in water are doing better than the ones in soil.


Ta da!!  It's so easy and now you can do it too!!  I can save $1 a week regrowing my own scallion.  My remaining question is I wonder how many times I can reuse each one.  If after I cook this one, I replant the green onion again, I wonder how many times I can do that.  We shall find out!!

(to be continued...)

Wednesday, July 11, 2012

Light Writing with Nikon D7000!!

Hubby and I discovered a new setting on his Nikon D7000 that allowed him to capture pictures of moving light source, such as fireworks!  Unfortunately, we didn't know about this during July 4th, so none of his pictures turned out well, but it's never too late to learn new tricks!!


What you need to capture these pictures:
13 seconds exposure, F stop of 16, ISO 100
Steady hands
A creative MODEL!! :)

LEVEL ONE: Writing letters that can be completed in a SINGLE STROKE


You can vaguely see me behind the letter. I was facing the camera and writing backwards, a mirrored image.  Some letters were tougher than others, so to start, I picked a letter that could be completed in a single stroke.


B and D were both pretty easy.  You can see on the left that I just looped it back.

Level TWO: Writing Words with More than One Stroke.

1) We extended the shutter speed
2) After I wrote my H, I turned off the light, moved over in preparation to write the I and then turned the light back on.  Basically, any time I wanted some "space," I turned the light off.

I did the same technique here...


ADVANCED LEVEL: Writing in CHINESE!
Now, I didn't know how to write these backwards.  So, we discovered that I could actually write these the normal way, but I would have to face AWAY from the camera.  I was writing them a little bit above my head and to my right.  The flashlight had to be shining AT the camera to achieve maximum effect.

This is the Chinese character "zi," which  means son.

 This is the Chinese character "xin," which could either mean letter or faith

This one was probably the hardest to write, because of the different stroke combination involved.  There is a box on top, which I had to fill in with lines.  On the bottom, the "heart" character is curvy.  I couldn't tell which one stroke ended and the other one started.  It was all just a guessing game.  We caught most of it though!  

It's the Chinese character "en," which means grace.

Now have fun with your light writing!  I don't think you necessarily have to have a fancy camera for it.  I'm pretty sure regular digital cameras can do it too.  If you take any, please do comment below or send them to me "bumbeepicks@gmail.com".  I'd love to see them!